29 July 2016

Meal Plan 31 July - 6 August 2016

Corned beef, mashed potato, carrot straws
Sunday: Roast Chicken

Monday: Spag bol, salad, garlic bread

Tuesday: Corned beef, mash, cauliflower, carrots, peas

Wednesday: Fish pie, cauliflower & broccoli casserole

Thursday: MOO Pizza

Friday: Kai Si Min

Saturday: Chicken soup, toasted crumpets


Follow on Bloglovin

22 July 2016

Meal Plan 24 - 31 July 2016

Aunty Mary's Beef Casserole - tasty winter comfort food

Sunday: Roast Beef, baked potato, sweet potato, carrot; steamed beans, cauliflower, gravy

Monday: Slow Cooker Curried Chicken and rice

Tuesday: Mock fish fingers, wedges, salad

Wednesday: Aunty Mary's Beef Casserole, mash

Thursday: MOO Pizza

Friday: Chicken pancakes, wedges, salad

Saturday: Hamburgers

Take an $8 Barbecue Chook……


Coles have reduced the price of their regular barbecue chickens to $8.

Now I'm not normally a fan of the good old Aussie barbecue chook, mainly because they have been in the past rather expensive.

I can by whole chickens for $2.99/kg. That makes a No. 20 (2kg) chicken $5.98 and that chicken will give me 12 serves of meat and the bones to make stock or soup. I can get three, usually four, meals from one chicken and no one goes hungry.

But sometimes I don't have the time, the energy or the inclination to wash, dry, season, stuff and roast a chicken. Sometimes picking up a barbecue chook is the better option. Remember, Cheapskating isn't about paying the lowest price all the time, it's about saving money, time and energy and being a good steward of your resources.

So yesterday while I was in Coles with Mum (Thursday is her shopping day) I picked up a barbecue chicken; here's how I used it.

First, I cut the wings and drumsticks off it - they are one meal for four.

We'll have them with roast veggies (potato, sweet potato, onion, carrot, parsnip) and steamed greens (beans or peas, broccoli or cauliflower) and gravy.

Secondly, I pulled the breasts off it.

One breast was shredded to make Curried Chicken. Yes, one chicken breast, shredded with a couple of forks, gives enough meat for six serves of Curried Chicken. The other breast was shredded and put in the freezer. It will be used to make the chicken filling for the pancakes we have on the menu next Friday. I make a white sauce, add a little diced onion, some sliced mushrooms (re-hydrated from the bulk lot I dried in January) and a little cheese and the chicken and it's delicious.

Then I pulled the rest of the meat off the bones and put it in the freezer.

I'll use this meat for Chicken Fried Rice or Chicken Salad Sandwich Filling - whichever we'll need first. Right now it will probably be for chicken salad for sandwiches as we've a day out four wheel driving with friends planned for next week and I know we'll be super hungry after being out in the cold and the walking and so on we'll be doing.


Lastly, I put the bones into the slow cooker with water, some celery tops, a sad carrot, and a large onion and let it cook overnight to make stock.

I use stock to cook rice, it gives it a really lovely flavour. We have curried chicken on the meal plan and we always have rice with it, so I've planned to have the stock on hand for this purpose.  I also use it to make gravy - again it gives the gravy a much richer flavour.

The rest I'll use to make Grandma's Chicken Soup for lunches next week. I won't have the whole chicken for this, obviously, as I've used it for other meals, but it will still be flavourful and healthy and the bones will give up the rest of the chicken meat.

19 July 2016

The Week that Was 17th July 2016

A new technique and a quick card is made!
What a busy week!

I had a lot of work to do, on top of getting ready for the Cheapskates Crafters card making retreat.

This week in our house we:

Caught the water from the showers and bucketed it into the washing machine.

Dried the washing by the fire and over the ducted heating vents.

Cooked all our meals from scratch using ingredients in the pantry, fridge and freezer.


I made a double batch of pita chips - one for home, one for the retreat.

Picked salad greens from the garden for our meals.

Filled the cars up (or rather topped the cars up) when fuel was 99.7c/litre - the cheapest it's been for a while.

Went through my craft drawers to find the materials needed for the card making retreat - didn't have to buy a thing.


Some of the cards I made at the retreat - three new techniques learned and mastered! And yes, I've started my Christmas cards :)
On the very cold days we turned the ducted heating on first thing in the morning and around 5pm for an hour to help the fire heat the house.

Once the cold snap was over, the sun came out. Having north facing windows is such a blessing in winter, the sun through the windows meant the house warmed up without the heater or the fire.

Made a batch of breadcrumbs using crusts from the freezer.

Came home on Sunday night to a sparkling house and a lovely hot dinner as well as a family who had obviously missed me, they surrounded me as soon as I walked through the door and bombarded me with questions and talking about their weekend. Sometimes we mothers wonder if we would be missed, my gorgeous bunch sure let me know I was.

What did you do to save money, time and energy last week?

15 July 2016

Meal Plan 17 - 22 July 2016


I'll be away this weekend at Phillip Island (or is that on Phillip Island?)  with the card ladies, so Hannah will be cooking the roast on Sunday. I'll be able to walk in the door to a piping hot dinner and I can't wait. She's very good at roasts, so  I know  it will  be good.

Next week we'll be eating:

Sunday: Roast Chicken

Monday: Peanut rice patties, salad

Tuesday: Quiche & salad

Wednesday: Spaghetti & meatballs

Thursday: MOO Pizza

Friday: MOO meat pie, veggies

Saturday: Tuna Melts

Tuna Melts

Ingredients:
400g tuna in water, drained
3 tsp mayonnaise
1 tsp prepared mustard (we like English for the kick)
1 tsp salsa (hot, medium, mild - it's up to you)
6 pieces sliced cheese (I use tasty because that's what we usually have)
12 bread slices (wholegrain is good, adds a nutty flavour to the sandwich)
Butter

Method:
In a bowl, combine the first four ingredients. Mix well. Butter one side of all 6 pieces of bread. Flip bread over. Divide tuna mixture between six slices bread. Assemble sandwiches with butter facing out. Cook sandwiches in a hot frying pan over medium heat, until lightly toasted on each side and cheese is melted. Makes six sandwiches.


Follow on Bloglovin

12 July 2016

A Back-to-School Lunchbox Treat


My mother made something similar to these rice bubble treats way back when I was in primary school. I adapted her recipe to make them for my kids when they were in primary (and high) school. Then all of a sudden Kelloggs decided to mass produce them, give them a quirky name and sell millions of them at an outrageous price.

Now Hannah has adapted the recipe yet again to make them for her morning tea at work - if the boys don't find them and devour them beforehand!

Call them what you will, we call them Ricie Bars, they are delicious, quick and easy enough to make that the kids can do it themselves. And Hannah's version is colourful too with the addition of mini M&Ms. They were on clearance at Coles last week for 50c a tube so she snapped up the lot to use in her baking. You could use regular M&Ms or Smarties or the generic equivalent. As long as they are colourful it won't matter.

Rainbow Ricie Bars

Ingredients:
6 cups Ricies
1 pkt marshmallows (about 200g - or MOO your own marshmallow)
3 tbsp butter
1 tsp vanilla extract
1 cup mini M&Ms

Method:
Line a slice tray with baking paper. In a large saucepan (big enough to mix the Ricies in) melt the butter. Add the vanilla and marshmallows and stir until completely dissolved. Remove from the heat and quickly stir in the Ricies and the M&Ms, mixing thoroughly. You will need to move quickly, the mixture firms up as it cools. Quickly spread the mixture into the prepared slice tray. Press down firmly, then roll over the top with a small glass to firm it down. Put in fridge for 30 minutes to set. Use a serrated knife to cut into bars when set. Store in an airtight container in the fridge.


Follow on Bloglovin

11 July 2016

5 Tips for a Stress Free Monday (or any day) Morning


It’s Monday morning (again).  You glance at the kitchen clock and gulp down a cup of coffee while attempting to put on your clothes at the same time and realise that you only have 5 minutes to get your 5 year old dressed and ready for school, not to mention you still need to pack her lunch.  Not soon enough do you remember that you were warned the previous Thursday by your easy-going boss (not!) for being late the third day in a row.

Sound all-too familiar? No one said being a working mum would be easy, but here are 5 steps to help you achieve that delicate Monday (or any) morning balance:

1. First and foremost, be prepared.  

If need be, pack your child’s lunch the night before.  Give your child a bath the night before as well.  Do your washing and ironing on the weekend so that all clothes are hung and ready to go; prepare at least 5 outfits for each member of the family over the weekend and have your husband and children assist you in the process.

When our children were small every Sunday afternoon we'd put out the school and sports uniforms for the week, complete with underwear, socks and shoes. They each had a five cubby hanging organiser in their wardrobes and their uniforms would go into them, one day per cubby. It took all of five minutes every Sunday afternoon and saved so much time in the mornings. Hannah still uses hers to organise her clothes for the week.

2. Set your alarm clock 30 minutes earlier to allow yourself more time in the morning.  

If need be, go to bed 30 minutes earlier to make up for the time difference. Wake up before your kids to shower and dress and get your day started peacefully.

Even when we only had one baby I'd get up at 6am to have some quiet time. I'd make a cup of coffee and sit and read for a few minutes before starting my day.

3. Keep breakfast simple and healthy.  

Set the table before bed, fill the kettle, put out the toaster, take the bread from the freezer to thaw. If you feel that you just don’t have the time for breakfast, try keeping bananas and other easy to eat fruit or hard boiled eggs handy and ready to grab and go.

It takes five minutes before bed to get breakfast organised and saves half an hour in the morning chaos. I put the oats in the saucepan and cover them with water to soak, put out the Weet-bix and bran, add coffee to mugs so that when it's time for breakfast most of the work is done.

4. Set a routine for you and your family and stick with it.  

Our bodies crave routine and that’s a fact.  Go to bed at the same time every night and wake up at the same time every morning.  Sticking with a schedule will make it easier to effectively manage that morning balancing act.

5. Divide your morning into phases.  

For example, phase 1:  eat breakfast, phase 2:  get dressed, etc.  Set the phases in 15-30 minute time increments (phasing increments can vary, depending on the overall time you give yourself).  Attempting to accomplish everything at once will only lead to chaos and confusion.  Help your family stay within the proper phase and ask them to also pitch in and help.  Encourage your family to stick to the morning phases to keep things running smoothly.

Even the youngest of toddlers can help to get ready in the mornings.

We had a "no play" rule for first thing. It avoided distractions and really helped keep everyone on task. When the kids were in school we had a 20 - 25 minute drive, depending on traffic, and had to leave on time if they were to be at school before the bell went.

The key to achieving any balance, especially that morning balance, is being prepared.  My mother used to say I was always getting ready for tomorrow today and in a way she's right. Doing what I can ahead of time, when I have the time, saves rushing and getting stressed.

Try a more organised approach to your mornings and you will find that they turn out to be a lot smoother and less stressful for everyone


Follow on Bloglovin

10 July 2016

The Week that Was 10 July 2016


I didn't post last week because we were away.  Wayne and I went to Ballarat last Saturday and stayed overnight for the Winter Wonderlights event at Sovereign Hill. It was cold! But so enjoyable. We stayed in one of the older hotels in Ballarat, full of history and just beautiful and then went to the Mill Market this morning. We took snacks and drinks and of course the picnic basket and thermos. I booked the hotel and bought our Sovereign Hill tickets online using my RACV discount.

Winter Wonderlights show at Sovereign Hill, Ballarat - it was cold but well worth the wait, the lights were beautiful and the carollers were gorgeous.

Sunday we woke to a cold, miserable, foggy and soggy day - typical Ballarat in winter. It was perfect for a trip to Mill Market, where we spent a very happy couple of hours oohing and ahhing and drooling over all the pretties.

Then it was time to head for home. I dropped Wayne at LaTrobe Uni in Bundoora so he could help pack up the stand at the Hobson's Bay Club train exhibition and headed on home.

We had no power on 30th June, from 8am until 5pm. It was cold, thank goodness for the fire. Of course no power meant no modem and no Internet unless we used our phones. It was such a peaceful day. I think we should have one power-free day every now and then, it does a soul good to listen to the silence and have time to think one thought at a time, slowly.

Collected water from the showers and added to the washing machine.

Kept the fire going and the ducted heating turned down to 15 degrees during the day. It only came on if the house was really cold. Turned it off completely overnight. I'm expecting a slightly lower gas bill next round.

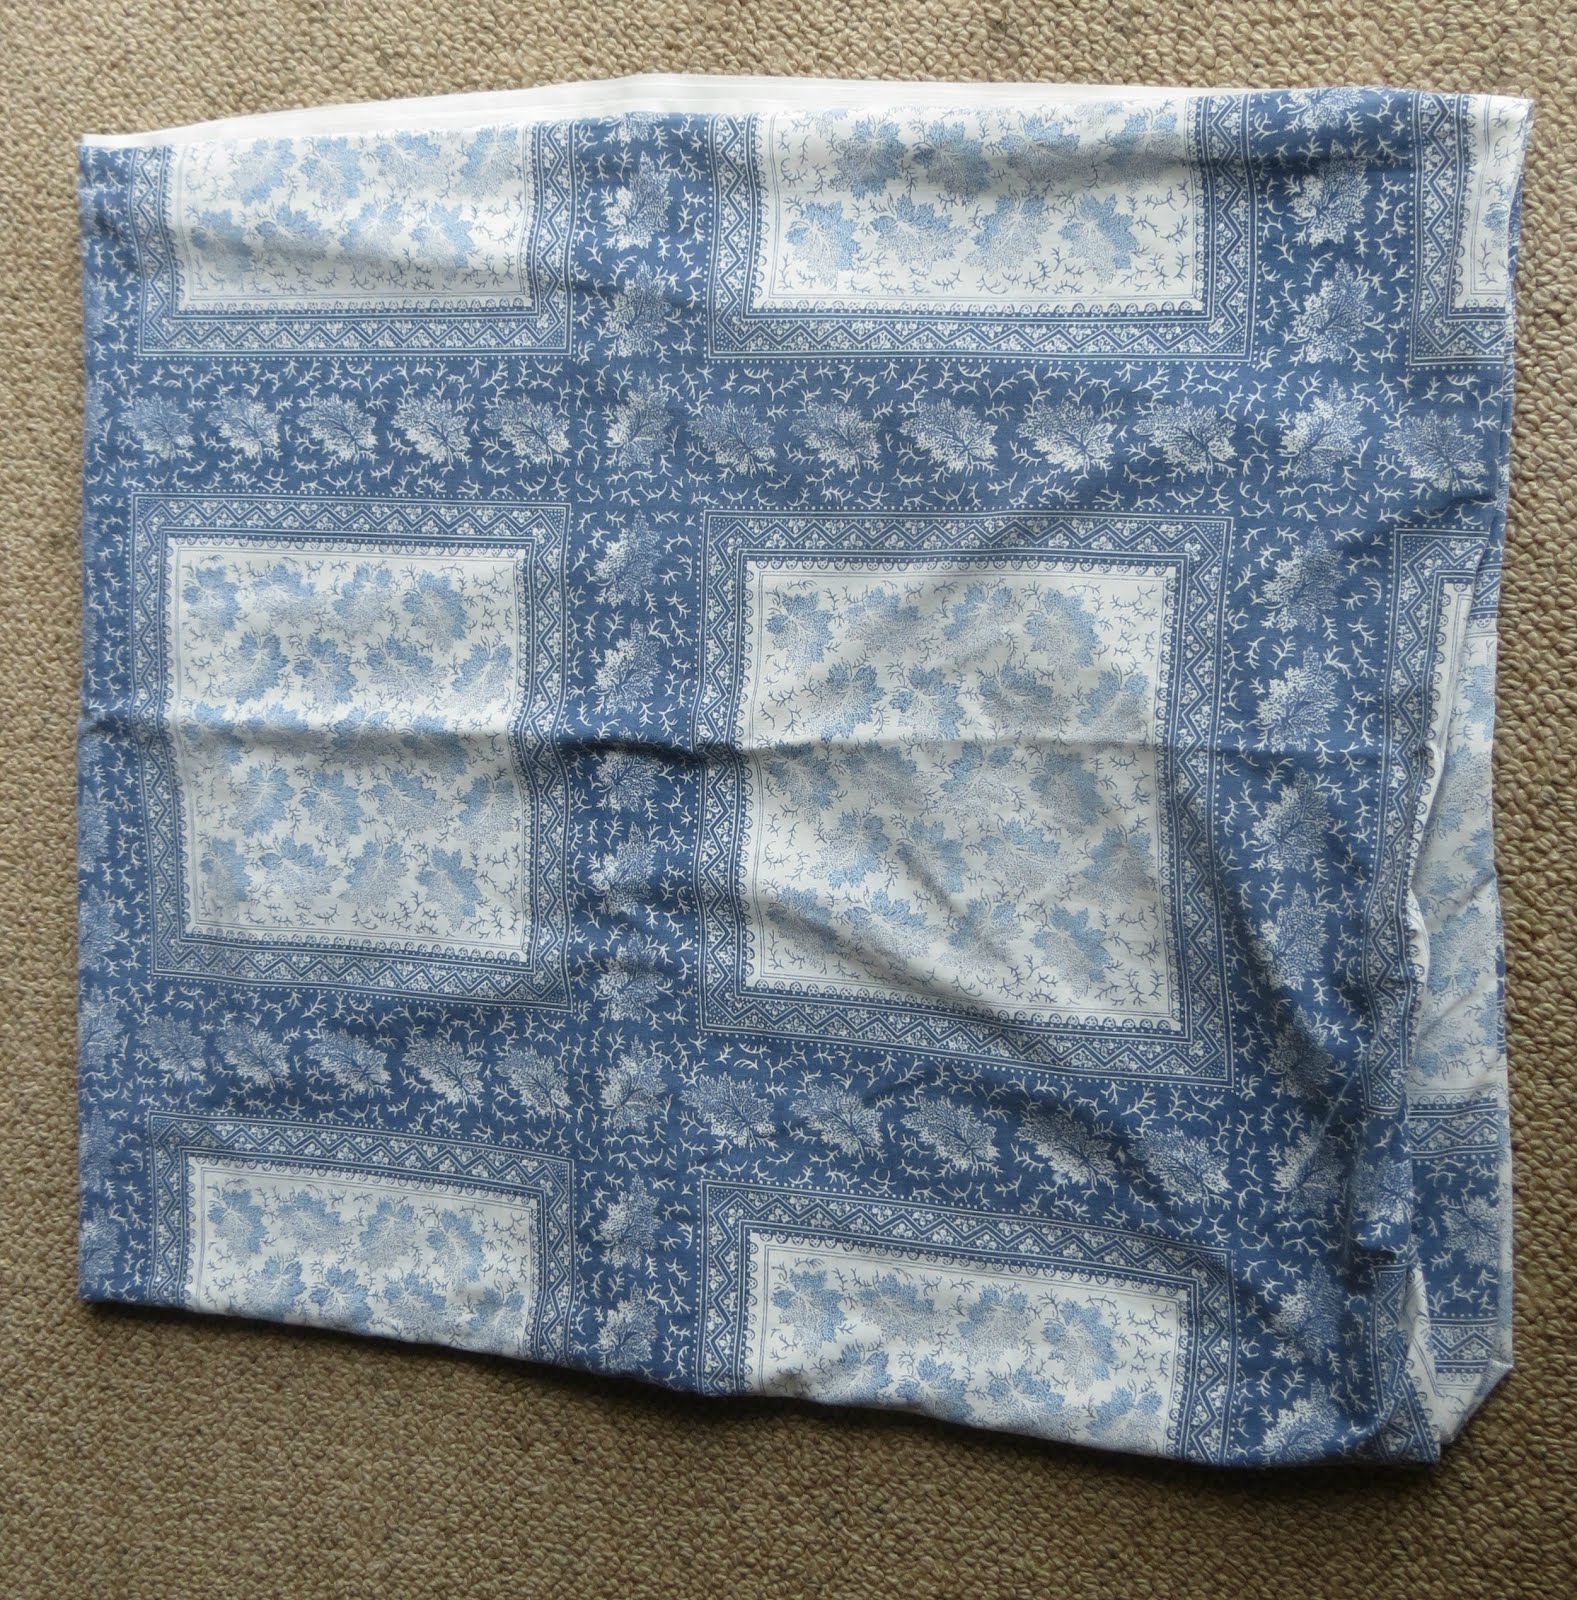
This week I've had some beautiful op shop finds for a grand total of $10.  I found a double doona cover to turn into a tablecloth for the kitchen table. It will also make 10 serviettes, two tea towels and two new pot holders. There's still fabric left so I may make more tea towels or perhaps a runner for the table. It's blue and white (of course) and coordinates beautifully with my blue and white plates on the wall.

Excuse the creases, I was in a hurry to get this post finished! The doona has washed up beautifully, now to just hem it and the tablecloth will be done!

I also picked up some flannelette pillow slips and a pretty flannelette sheet. I'm going to make pot holders from the pillow slips and re-usable make-up wipes from the sheet. The make-up wipes are going into gift baskets for Christmas.

I found two new vintage embroidered tablecloths, a doyley and a cushion for our bed too. We're in the process of redecorating our bedroom and this little pillow will fit right in to the colour scheme and style and I just love it.

I went to a couple of paint shops to collect colour chips and to price paint. Now to make a final decision and get started.

I measured the window in our bedroom. It's an odd size - 4.5 metres wide. I have some lace curtain I've been saving ( or hoarding, depends on your point of view). If I'm very careful and don't make the curtain quite as full I may just have enough and that will save at least $150. I can reuse the tape off the current curtains which will save more.

Made breadcrumbs using crusts from the freezer.

Added three extra single serve meals to the freezer.

Last week I double batch cooked Sweet'n'Sour Chicken, curried sausages and mac'n'cheese and froze half for future meals.


Picked lettuce from the garden for sandwiches.

Used 50:50 cordial base from the freezer to make cool drinks this week.

We've eaten all our meals cooked from scratch using ingredients in the pantry, fridge and freezer. The freezer is gradually emptying as we go through this year of minimal grocery budget.

I planted some more broccoli and cauliflower seedlings and fed the growing plants with worm tea.

All the kitchen scraps were either fed to the worms, composted or added to the bokashi bucket. It makes such a difference to how full the garbage bin gets.

Dried all washing on the clotheshorses next to the fire.

Getting the most from the firewood - heating the house and drying the washing!

Took advantage of the rain to wet my car, then I raced out with a bucket of soapy water and the broom and quickly gave it a wash. Then a quick squirt with the hose and it was shiny and clean again. Saved $8 at the car wash and only took 5 minutes. And yes, I'm sure our neighbours think I'm mad!

Took the hems up on some trousers for Mum.

Made some vanilla room freshener for the bathrooms.

Downloaded some free ebooks for my kindle.

Downloaded some free embroidery patterns.

Downloaded some free card making templates.

Downloaded some free scrapbooking papers to use as backgrounds for  cards.

Made a baby card for Hannah to take to a baby shower next weekend. Put a gift together from the present box and wrapped it all in a recycled and redecorated paper shopping bag. Saving - up to $30.

Revised our spending plan for the last six months and the next six months. It's the start of a new financial year and a good time to review budgets to make sure they're on track. If they're not it's early enough to catch and make any necessary adjustments so you end the year on track financially.

What have you done to save money, time and energy this week?


08 July 2016

Meal Plan 10 - 16 July 2016


One of our favourite winter meal is chilli and cornbread. I make the cornbread from scratch and we eat it hot, straight from the oven, with a big bowl of chilli. Any leftover cornbread is delicious thinly sliced and toasted for breakfast the next morning.

Cath's Crockpot Chilli

Ingredients:
2 cans baked beans in tomato sauce
240g can tomato paste
400g can diced tomatoes
1kg mince, browned and drained
2 medium onions, coarsely chopped
1 cup diced celery
1 clove garlic, crushed
1 tsp cumin
1 tsp chilli powder (more or less to taste)
salt and pepper to taste

Method:
Put all ingredients in slow cooker in order listed.  Stir gently to blend, being careful not to break up beans. Cover and cook on high for 5-6 hours or low 10 - 12 hours. Times will vary between slow cookers. Test after the minimum time to see if the meat is cooked and the sauce has thickened. Serve with rice and cornbread.

Easy Cornbread 2

Ingredients:
1 cup cornmeal
1 cup plain flour
1/4 cup sugar
2 large eggs
1 cup milk
1/4 cup butter, melted

Method:
Stir all ingredients in mixing bowl until just combined. Mix with electric mixer on medium speed for one minute. Pour into well greased 20cm square cake tin. Bake at 220 degrees Celsius for 20 - 25 minutes until golden brown. Cool on wire rack.

Sunday: Roast Lamb

Monday: Chicken & rice casserole

Tuesday: Pasta bake, salad, garlic bread

Wednesday: Chilli and corn bread

Thursday: MOO Pizza

Friday: MOO Butter chicken and rice

Saturday: Tacos

This Week's Fruit and Veg Haul

Sweet potato 29c/kg and bananas 99c/kg at Pellegrino's this week
Some great prices at Pellegrino's and Bushy Park this week, so good I couldn't resist and did dip into next month's grocery money on my way home from the station run early this morning.

Pellegrino's:
Sultana grapes $5 a box
Bananas 99c/kg
Sweet potato 29c/kg
3kg bag oranges $2
10kg bag large brown onions $7.50

Bushy Park:
Bananas for 78c/kg - another great price and a good winter fruit.

I bought up big on sweet potato. We love sweet potato roasted, as mash, in Sweet Potato Chocolate Cakes, in pumpkin and sweet potato soup and as wedges. It's a very versatile veggie and stores well in the pantry. I put it into a hessian bag so it stays dry, cool and dark and keep the bag in the bottom of the pantry. If you haven't tried sweet potato yet, do.

Pellegrino's also have 3 kilo bags of oranges for $2, not quite the 5c/kg I paid at the end of last year but they're so sweet and we've picked all off our tree for the moment. I put half in the fruit bowl and have processed the rest for Whole Orange Cake.

\

Follow on Bloglovin

05 July 2016

This Week's Meat Specials


I've just received the email catalogues and the meat specials for Victorian Cheapskaters this week are mostly chicken, but that's OK, we like chicken.

I have a little room in the freezer and little money left in the meat budget so I'll be buying whole chickens from Tasman (they work out a little cheaper than the No. 18's from Australian Butcher Store) and stocking up on chicken fillets from Australian butcher store.


Whole chickens $2.99/kg

Chicken breast fillets (skin on) $4.99/kg
Chicken casserole pieces $2.99/kg minimum buy 2kg
No. 18 whole chicken $5.99 - this is a family size chicken that will easily feed 6 with leftovers, a great price


Follow on Bloglovin

Creamy Root Veggie Bake


Winter is the perfect time to enjoy root vegetables. They go well with a roast or as a side dish to grilled meats. This recipe fits beautifully in a no waste kitchen, as only the turnip and swede (and yes, they are different vegetables) are peeled. It is also a little unusual in that it uses the celery root, the white bottom part of the celery, that is usually composted. You'll need to wash it well and use a veggie peeler to scrape away any tough fibres before you slice it.


Yield: 6 - 8

Creamy Root Veggie Bake

ingredients:


  • 2 large potatoes, scrubbed and sliced thinly
  • 1 turnip, peeled and sliced thinly
  • 1 swede, peeled and sliced thinly
  • 1 parsnip, washed and sliced thinly
  • 1 celery root, washed, peeled and sliced thinly
  • 1 large carrot, washed and sliced thinly
  • 2 tbsp butter
  • 2 garlic cloves, crushed
  • 1-1/4 cups chicken stock
  • 1 cup cream
  • 1 tbsp chopped fresh thyme
  • 1 pinch ground nutmeg
  • 1 pinch cayenne pepper
  • salt and black pepper to taste
  • 1/4 cup finely grated Parmesan cheese, divided

instructions:


  1. Preheat the oven to 170 degrees Celsius. 
  2. Coat a baking dish with olive oil.
  3. Get out a large pot, fill with water and bring to a boil. Add the vegetables and cook uncovered for 3 minutes (you're just blanching the veggies, not cooking them.)
  4. Prepare large ice bath in sink.
  5. Dump the veggies into a large colander or strainer, then immediately immerse the strainer of veggies into the ice bath for several minutes until veggies are cold - this stops the veggies from cooking further after being drained.
  6. Remove the strainer of veggies from ice bath and drain well.
  7. In a large frying pan, over medium-low heat, add the butter and garlic and cook for about 1 to 2 minutes or until garlic gets fragrant.
  8. Add the stock, cream, thyme, nutmeg and cayenne pepper, stir and continue cooking until mixture begins to simmer and thicken, about 5 minutes.
  9. Spread vegetables evenly in the prepared baking dish.
  10. Pour creamy mixture from skillet evenly over vegetables and sprinkle half of the grated Parmesan cheese over the top.
  11. Cover the baking dish with oiled foil, put dish on top of a baking sheet to catch any spills, and bake in the preheated oven for 40 to 45 minutes.

04 July 2016

How to Make a Paper Tole Card


I used to do a lot of paper tole when the children were smaller, usually at night when they were in bed. It was a way for me to unwind from a frantic day before I went to bed.

I love the detail in these 3D cards and they are so easy to do.

You can buy kits from craft shops, or you can be a true Cheapskate and make your own.

You will need:
1 sheet of good quality wrapping paper - don't skimp, the paper needs to be a good quality to withstand the layering and glue
PVA glue
Curved nail scissors
A blank card - size is up to you and will depend on the size of your image.
Foam sticky dots or matchsticks cut into 10mm lengths (I prefer to use sticky dots, you can get them at any $2 or craft shop)

Step 1. Decide how many layers you want on your card. Traditionally paper tole is between 5 - 7 layers. For a card up to 4 layers is enough - you don't want the card design too deep to be able to fit an envelope or post.


Step 2. Choose your image. Using your nail scissors cut out the number of images you need - in my example I've cut out four.


Step 3. Taking one complete image, carefully cut around the edge using the curved nail scissors. Curved nail scissors make cutting the fine detail so much easier than regular craft scissors and give the edges of the image a nice finish. Glue this image to the card. This is your base.

Step 4. Taking the next image, choose which parts you are going to layer onto the base. Use the nail scissors to cut them out. Using the sticky dots, stick them in place over the corresponding part of the base image.


Step 5. Continue as above with the third image, layering with the sticky dots to give finer detail.


Step 6. The fourth and last layer is the layer with the finest detail. You may need to cut the sticky dots in half as the layers are small for this step.


Step 7. Add a sentiment if desired - handwritten, stamped or pre-made and glued in place.

And there you have it - a gorgeous paper tole card for the price of a sheet of wrapping paper and a blank card - under $2.50. And depending on the size of the design you choose you will get at least four cards from one sheet of wrapping paper, bring the cost down even more.


Follow on Bloglovin

01 July 2016

Meal Plan 3 - 9 July 2016

Quick Curried Sausages - a hearty and cheap winter dinner

Things happen and even the best planned meal plans can sometimes change. Wayne and I will be away tomorrow night, so Hannah has swapped the meal plan around and she'll be making kebabs for dinner using leftover roast meat and wraps from the freezer and salad veggies from the fridge.

On Tuesday we had curried sausages for dinner. I only had four sausages but they made six hearty serves of casserole, enough for dinner and a freezer meal.

Here's the recipe I used, it's from the Cheapskates Club Recipe File.

Quick Curried Sausages

Ingredients:
1 sausage per person
1 potato, peeled and cubed
1 piece pumpkin, peeled and cubed
1 small sweet potato, peeled and cubed
1 large onion, peeled and diced
1 cup peas
2 tbsp curry powder - adjust to suit your taste
1 tbsp butter
1-1/2 cups MOO low-fat evaporated milk
2 tsp coconut essence

Method:
Place the sausages in a pot of cold water to cover and slowly bring to the boil. Simmer five minutes. Drain. Allow to cool a few minutes then slip the skins off the sausages. Slice into 1cm thick pieces.. Add onion, water and curry powder to a frying pan and cook until the onion is transparent. Add the other vegetables to the pan and cook two minutes, stirring constantly. Turn heat down to low. Add evaporated milk and coconut essence and stir through. Add sliced sausages to pan. Stir to cover with sauce. Simmer over a very low heat 10 minutes or until vegetables are cooked and sauce has thickened slightly. Serve over steamed rice with pappadums or naan bread.

This week we will be eating:

Sunday: Roast Chicken, baked vegetables, steamed beans, gravy

Monday: Tuna

Tuesday: Chops and veggies

Wednesday: Mexican meatballs, steamed rice

Thursday: MOO Pizza

Friday: MOO Honey mustard chicken, mashed potato, steamed greens, carrots

Saturday: Homemade Soup and toast

What will you be eating this coming week?